Summary: If you want to enjoy XAVC on Zeiss VR One via iPhone 6, you’ve come to the right place! Move on to learn tips and tricks.
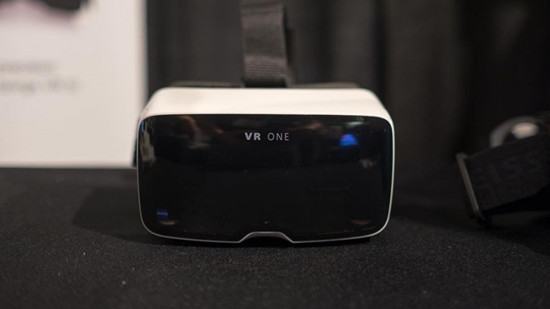 XAVC has been developed as an open format, which means that manufacturers other than Sony can develop their own products based on the technology. Sony then developed another version of XAVC—XAVC S—to put 4K workflows in reach of more and more users in the consumer market as well. XAVC S supports 4K, HD, and proxy workflows, and also utilizes the MPEG-4 AVC/H.264 codec.Virtual Reality on iOS has arrived. With the virtual reality headset offered by Zeiss VR One, you can now convert your iPhone 6 into an great 3D experience. The Zeiss VR One offers a Cinema app to enable you to enjoy your movies save in your iPhone in an immersive environment with the lights off. When you see here, do you have any desire to enjoy your wonderful XAVC/MKV videos on Zeiss VR One via iPhone 6? Or enjoy your AVI files on Zeiss VR One via Galaxy S4/S5/S6? If so, just read on to find out how to achieve it.Zeiss VR One is currently compatible with iPhone 6, Samsung Galaxy S4/S5/S6, Nexus 5, and LG-G3 smartphones and supports MP4 and MOV formats. In order to watch XAVC on Zeiss VR One with iPhone 6, you just need a right program and convert XAVC to 3D SBS MP4 for smoothly playing on Zeiss VR One via iPhone 6. Here Pavtube Video Converter is highly recommended, you can get this job done perfectly. With the latest version 4.8.6.5, this program adds Apple ProRes as output, supports encoding to H.265 MKV and is compatible with Sony/LG/Samsung/Panasonic TVs. If you are running on Mac operating system, you can refer to the equivalent version- Pavtube Video Converter for Mac (review). It works well even on the latest Mac OS X El Capitan.
 Other Download:- Pavtube old official address: http://www.pavtube.com/video_converter/- Amazon Download: http://download.cnet.com/Pavtube-Video-Converter/3000-2194_4-75734821.html- Cnet Download: http://download.cnet.com/Pavtube-Video-Converter/3000-2194_4-75734821.htmlHow to convert XAVC to iPhone 6 for watching on Zeiss VR One?Step 1: Download, install and run the corresponding program. Click “Add Video” or “Add from folder” to load your XAVC files.
 Step 2: Click the “Format” bar and select “3D Video>>MP4 Side-by-Side 3D Video (*.mp4)” as output format.
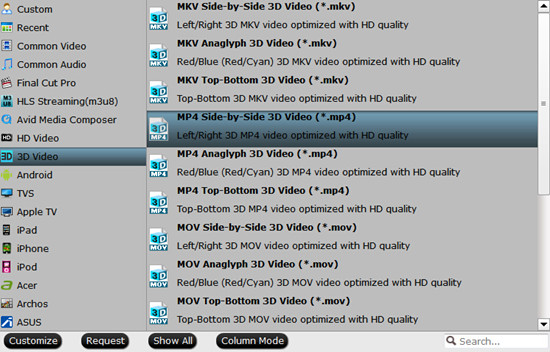 Step 3: Click “Settings” button to customize the output video and audio settings by yourself. But if you are not good at it, you’d better use the default parameters, they will ensure you a good balance between file size and image quality basically. You can change the resolution, bit rate, frame rate as you need.Step 4: Go back to the main interface, hit the big button “Convert” there.Conclusion: There is no need for waiting for a long time. We can receive the best output files nicely. After conversion, you can get the generated files by hitting “Open” button. You can simply add the keyword “SBS” to the file name of the video, and the app will automatically show the correct content for each eye.Source: http://pc-mac-compatibility-issues.blogspot.com/2015/08/convert-xavc-to-3d-sbs-mp4-for-zeiss-vr-one.htmlFurther Reading:
Summary: For most camcorder or video fans, do you all know exactly what is XAVC and the best way to import XAVC in Windows and Mac? Here you can learn the best answer to play XAVC videos or edit XAVC files on Windows and Mac with more details.
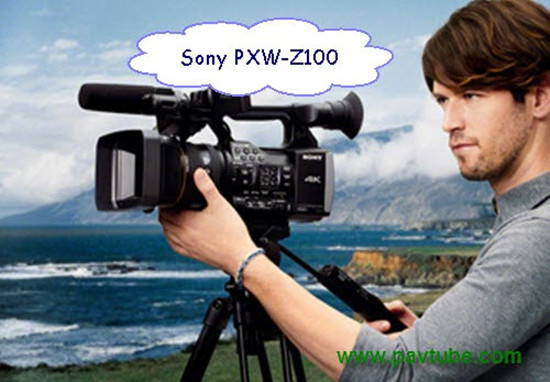 Although being a new recording format introduced by Sony, XAVC has been widely adopted now. Typical CineAlta camera that support XAVC include Sony PMW-Z100, PMW-F55 or more. It supports the following content formats:
- 4K, HD and Proxy resolution
- MPEG-4 AVC/H.264 video compression
- 4:2:0, 4:2:2, or 4:4:4 chroma subsampling
- up to 60 frames per second(fps)
If you got XAVC recordings by Sony PXW-Z100 camcorder and wanna edit or play your XAVC videos on Windows or Mac, it may cause you some troubles just with the incompatible formats. So Pavtube Video Converter (Mac version) is a professional XAVC Converter with simple and efficient Sony XAVC conversion workflow. It’s a good camcorder assistant for Sony XAVC camcorder users, also adopt advanced audio and video sync technology. Various common videos are supported here, for example: MP4, MOV, MKV, AVI, M4V, etc. Also suitable for popular editing tools as FCP,iMovie etc.Fortunately, as soon as the Pavtube Windows products have all upgraded to the latest version, they fix the XAVC conversion bugs and what’s more, add Apple ProRes as output, support encoding to HEVC MKV, compatible with Sony/LG/Samsung/Panasonic TVs. Other Download:- Pavtube old official address: http://www.pavtube.com/video_converter/- Amazon Download: http://download.cnet.com/Pavtube-Video-Converter/3000-2194_4-75734821.html- Cnet Download: http://download.cnet.com/Pavtube-Video-Converter/3000-2194_4-75734821.htmlSome steps are allowed below to teach you how to convert XAVC files for Windows/Mac:Step 1: When you download the XAVC Video Converter for Windows/Mac, you will find they two guys has the same import step, open the “Add video” or “Add from folder” to load XAVC files correctly, however, you must choose different output formats for Windows version and Mac version.Step 2: For Windows: you can choose the following one as a reference, “HD Video>>H.264 Video (*.mp4)”, other Windows accepted formats can be selected too. Tips: For Mac: for example, “Common Video>>H.264 Video (*.mp4)”, here, you can find more Mac supported video formats. Just choose on you want.Step 3: As we mentioned above, we can be pleasure to edit our personal videos when you get into the “Editor” interface. To decide your video length? Have the “Trim” button for a try. Add some subtitles into your movie? Maybe “Subtitles” can do you a favor. More items here you won’t be disappointed.Step 4: Then go to the main interface and just click the “Convert” button to start your conversion.Conclusion: Are you still confused in working Sony XAVC video files on Windows and Mac? Let’s enjoy ourselves with this Sony PXW-Z100 camcorder!Source: http://mediaconverting.blogspot.com/2015/01/import-pxw-z100-xavc-to-windows-mac.htmlFurther Reading:
Pavtube Studio just announced all Pavtube Windows products, including BDMagic, ByteCopy, DVDAid, Video Converter Ultimate. Video Converter, MXF Converter, HD Video Converter, MTS Converter and MXF MultiMixer, are upgraded. PC users now can encode Blu-ray, DVD movies and all kinds of Common/HD/4K Videos to MOV with Apple ProRes codec, HEVC/H.265 MKV, and Sony/LG/Samsung/Panasonic TV formats with excellent video/audio quality and super speed. Registered users could download and install the latest version for solution to their issues.See also:
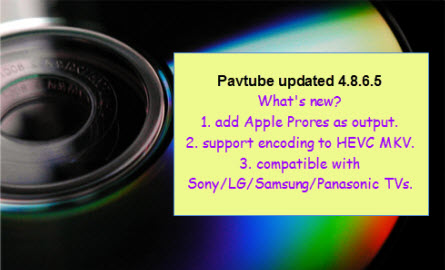 What's new in this upgrade?1. Add Apple Prores as outputPC users who are eager to create Apple ProRes video under Windows OS would love the new upgrade of Pavtube Windows programs because this has been realized in the new version. Pavtube adds Apple ProRes MOV in Format list for fluent video playback, video editing, and personal use you desire.2. Support encoding to H.265/HEVC MKVAnother new element in the new Pavtube programs is that registered users now can save Blu-ray, DVD, and video sources to HEVC/H.265 MKV. HEVC provides better video quality in same file size compared to H.264. And Pavtube members can do that in the new upgrade with fast speed.3. Compatible with Sony/LG/Samsung/Panasonic TVs.Last but not least, Pavtube software is not compatible with Sony, LG, Samsung and Panasonic TVs. Pavtube adds these TVs under Format menu, without extra operations, you can easily create movies and videos for perfect playback on any of these TVs.More information you need about the new upgrade and Pavtube products can be found on Pavtube official website.Pavtube Software Upgrade Promotion on Facebookhttp://bit.ly/1hmOn34This upgrade, Pavtube Facebook provide up to 35% Off Blu-ray/DVD Ripper & various (HD) Video Converters, the best yet easy-to-use tools to convert your Blu-ray/DVD movies, Common/HD/4K Video files into H.265 MP4/MKV, Apple Prores, various TV profiles, M3U8, MP4, MOV, MKV, AVI, M4V, WMV, VOB, MPG, FLV, SWF, Divx, Xvid, AAC, MP3, WMA, WAV, M4A, AC3, FLAC and more onto smartphone, tablet, computer, media player, stream server, TV set, game console, VR headset, hard drive, etc. with multiple wanted audio/language/chapter markers!Up to 35% OFF Discount can be shared here:35% Off Pavtube BDMagic for Windows or Mac35% Off Pavtube DVDAid for Windows or Mac30% Off Pavtube Video Converter Ultimate for Windows or Mac30% Off Pavtube Video Converter for Windows or Mac20% Off Pavtube ByteCopy Windows or Mac20% Off Pavtube MTS/M2TS Converter for Windows or Mac20% Off Pavtube Multi-track MXF Converter for Windows or MacJust like us on page and you can get it with all other free software giveaways, useful guides, and lifelong discounts.If you have any problem to buy or use Pavtube software, pls feel free to contact support@pavtube.com (for Windows user), macsupport@pavtube.com (for Mac user).
 More Topics
Summary: Most NLEs can’t support the .mts files which came from Sony A7II XAVC , how to deal with this problem to import videos natively? Most editors in the market like FCP, Adobe Premiere, they are all included in non-linear editing system. The most outstanding advantage of the non-linear editing is that if you import your source videos into those editors, there will be no lose or modified during editing. This is one of the biggest advantages of non-leaner editing compared to linear editing.Here is the best XAVC Video Converter Review which I hope can help you a lot in editing or playing XAVC files.But did you find that if you want to directly import your source video into those NLE to do the following edits, which some error messages will pop up? That was because your source videos came from your camera can’t be opened natively. Take this Sony Alpha A7II for example, the video shoot under the XAVC-S mode may came as MXF, which cannot be natively supported by those NLEs.How to convert those XAVC-S MXF files to open them natively in NLE?Since there are so many NLE in the market , let’s take this FCP for example. You may say that with the latest FCP, this MXF format can be supported without any rewrapping. But with this XAVC codec, it may still cause some problem when you import them into FCP. The best way to tackle this kind of problem is to find yourself a XAVC Converter and then convert to the native format like Apple ProRes HQ. Here Pavtube HD Video Converter for Mac (review) is highly recommended. It’s more than a converter, it’s also an editor and a player.
 Other Download:- Pavtube old official address: http://www.pavtube.com/hd-video-converter-mac/- Amazon Store Download: http://www.amazon.com/Pavtube-Video-Converter-Mac-Download/dp/B00QI9GNZS- AppStore Download: https://itunes.apple.com/de/app/pavtube-hd-video-converter/id502792488?mt=12- Cnet Download: http://download.cnet.com/Pavtube-HD-Video-Converter/3000-2194_4-76177786.htmlSee detailed workflow of this conversion below:Step 1: Download this Pavtube HD Video Converter for Mac and install it step by step. Then load your XAVC MXF files into this software by clicking “Add Video” or “Add from folder”.
 Step 2: After importing them into this program, it’s time to select suitable output ones for different non-linear editing tools. Let me show you some examples below:A: Come to the output list, let’s choose the “Final Cut Pro” to select the “Apple ProRes Codec 422 (*.mov)” as the best. Additionally, you can also choose several ProRes codec as your favorite.
 B: For Avid Media Composer: Drop down the output list, we suggest you to choose the “Avid Media Composer>>AvidDNxHD (*.mov)” as the best output.C: While for iMovie and FCE, here we have offered the “iMovie and Final Cut Express>>Apple InterMediate Codec (AIC) (*.mov)” there. Do you wanna a try?Step 3: When everything is done, back to the main interface and click “Convert” to start the conversion work.Conclusion: After conversion, you can get the generated files by hitting “Open” button. Now, you can easily editing Sony Alpha a7II XAVC S in FCP, Avid Media Composer and iMovie/FCE.Expand Knowledge:NLE is an acronym, it stands for non-linear editing system. This is a video or audio editing digital audio workstation system. Non-linear editing is the most natural approach when all assets are available as files on video servers or hard disks. Rather than recordings on reels or tapes, while linear editing is what kind of system that need to sequentially view film or hear tape.Source: http://digisns.com/2014/12/convert-sony-a7ii-xavc-to-mov-in-nle/Further Reading:
Summary: In this tutorial, we explore how to edit Sony a7II XAVC S files in Premiere Pro CC/After Effects CC. Hope you can find answers below.
 The Sony Alpha A7 II is the sequel to a camera series that bowled us over last year. Now it has come to us. In addition to highly detailed stills with smooth gradations, the a7II now has access to the high-bit-rate XAVC S format with 60p, 30p, and 24p recording options, all at 50 Mbps. If you've got some XAVC S material from Alpha A7 II, you will research possible workflows, so as to as have smooth work with the Sony a7II XAVC S in PPro CC/AE CC.Why is a7II so popular among photographers? Though more and more HD cameras have been released by Sony, a7II has the stable shooting ability and the high definition output footage XAVC S. But the only disadvantage is as follows: “As a teacher who teaches video production in the studying courses, I’m trying to use my Sony A7II camera to shoot some recordings of my students and pick them out to show in the Students’ ‘Film Festival’, I need to edit the output videos in Premiere Pro CC on Mac. However, it seemed that XAVC S files are not so compatible with this program, right? How about editing in After Effects CC?”Tips: Adobe Premiere Pro supported formatsWhile enjoying the stunning videos recorded of HD image quality, many users are having problems when trying to edit Alpha a7II XAVC S in some popular NLEs. What we need here is a XAVC S Video Converter! Easy operations to do with XAVC S files and make them accepted by common editing programs and media players with a high quality preserved. Here, you can depend on Pavtube HD Video Converter for Mac. If you are Windows users, you can refer to Pavtube HD Video Converter. Other Download:- Pavtube old official address: http://www.pavtube.com/hd-video-converter-mac/- Amazon Store Download: http://www.amazon.com/Pavtube-Video-Converter-Mac-Download/dp/B00QI9GNZS- AppStore Download: https://itunes.apple.com/de/app/pavtube-hd-video-converter/id502792488?mt=12- Cnet Download: http://download.cnet.com/Pavtube-HD-Video-Converter/3000-2194_4-76177786.htmlHow to edit Sony a7II XAVC S in Premiere Pro CC/After Effects CC?Step 1: Backup your XAVC S videos from a7II to hard drive. Install and launch XAVC S HD Video Converter for Mac. Drag and drop XAVC S files to the software. You can import multiple files at once thanks to “Add from folder” button.
 Step 2: Click the drop-down list in the format line to get the format box. Then choose “Adobe Premiere/Sony Vegas>>MPEG-2 (*.mpg)” as output format for editing in Premiere Pro CC/After Effects CC.Tips: WMV (VC-1) (*.wmv) and MOV (AVC) (*.mov) are both supported. Generally, MPEG-2 is a well-accepted file format for its ability to keep up the video quality and its popularity.
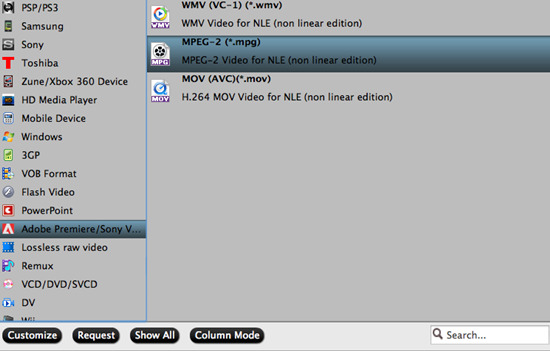 Step 3: Do some simple edit work.
De-interlace: By default the XAVC S HD Video Converter for Mac will apply de-interlacing facility to some clips that are interlaced. Just click “Edit” to enter the video editor, switch to “Effect” tab, and check the “Deinterlacing” box.Trim: Basically, video hosting sites restrict video clips to be in certain file size and length. For example, YouTube stated that “videos can be up to 2GB in size and 10 minutes long”. You can trim the video to desired length with this HD Video Converter for Mac. Simply click “Edit” menu>>”Trim” tab and set start and end time point.Merge: To join multiple videos together, just select them in file list, and tick off the checkbox “Merge into one file” on the main interface.Step 4: You can preview to check the final result. Once you are satisfied with it, click the “Convert” button to start converting XAVC S videos to MPEG-2 .mpg format. It will take you a little while.Conclusion: After conversion, you’ll get no troubles in editing a7II XAVC S videos in Premiere Pro CC/After Effects CC. Follow the steps and have a try!Source: http://camcordervideoshare.altervista.org/blog/edit-xavc-s-in-ppro-after-effects-cc/Further Reading:
Summary: XAVC codec has already become the mainstream codec now. But most edit software such as FCP X/iMovie can't handle such video codec. How to tackle this problem?
 For many camera and video guys, this XAVC is very familiar with them. XAVC is a recording format that was introduced by Sony on October 30, 2012. And XAVC used level 5.2 of H.264/MPEG-4 AVC which is the highest level supported by that video standard. XAVC can support 4K resolution (4096*2160 and 3840*2160) at up to 60frames per second. That would be a big progress for promoting the 4K movie spread. This format has already become the foundation of the modern digital devices. And Material Exchange Format (MXF) may be used as its digital container format.Now, here comes the problem. With this wide spread codec, more and more companies just develop their products based on this codec. Sony, which the initiator of this digital revolution, has made many customers encountered their “Waterloo”. Although Sony claimed that FCP X can support this XAVC naturally, the truth is just on its opposite. For some users who wants to do some following edits in FCP X or iMovie , this work just can’t be done. Enjoy these high definition videos on their Table, phone or TV just can’t be realized. How frustrating it is! You owned a bunch of fabulous videos, but you just can’t enjoy them.How to import your high definition XAVC videos into your edit software or enjoy them freely on your mobile devices? Here are two ways to get you free from this dilemma.Method 1: Using Sony XAVC/XDCAM Plug-in for Apple (PDZK-LT2) for FCP or XAVC/XDCAM Plug-in for Avid (PDZK-MA2) for AvidIn order to solve this problem, Sony itself has released two plug-in proxies for users. These are Sony XAVC/XDCAM Plug-in for Apple (PDZK-LT2) for FCP and XAVC/XDCAM Plug-in for Avid (PDZK-MA2) for Avid. Those tow plug-in are developed by Sony, they are free and in most of the circumstance, they can solve users’ can’t import XAVC problem.But these free apps will work well if your video file structure is very intact. Users can directly import their video folder into this free plug-in from their camera. Or copy the whole file structure into their hard drivers then load them info these MXF plug-in apps. Those are the premises to use these free proxies. But if you just get some “Orphan” MXF files from your clients? If you just download it from somewhere that the files never will have a complete structure? Or if you just messed up your videos with other files? How to solve it?Method 2: Applying for some third-party XAVC Converter software to solve XAVC unavailable problem.There are so many converter apps in the market for users to choose, but which one is the best one for XAVC codec converting? Here, I would like to recommend this Pavtube iMixMXF for you guys. As you can tell from the name, this app is professional for handling MXF format. And one more features I would like to mention about is “Multi-track Video” option. Think about it, there must be a inner mic in your camera and sometimes you just want to install an external mic for a better audio effects. Then there will be two audio tracks in your recorded video. Some normal MXF converters can only keep one of them and lose another one or simply messed them up. But to this Pavtube iMixMXF , you don’t have to worry about this will happen. For win users, Pavtube MXF Multimixer can run on win 8 smoothly. Other Download: - Pavtube old official address: http://www.pavtube.com/imixmxf-mac/- Amazon Download: http://www.amazon.com/Pavtube-Studio-iMixMXF-Download/dp/B00QI7MY4Y- Cnet Download: http://download.cnet.com/Pavtube-iMixMXF/3000-2194_4-76171460.htmlThe detailed workflow of using iMixMXF to convert XAVC (*.mxf ) files:Step 1: First, go to the Pavtube official website to download this iMixMXF then install it step by step. Second, load your XAVC (*.MXF) files. You can load them by click the “Add Video” or “Add from folder” icon on this program’s main UI. Directly drag your video into this software is also very convenient if they are on your desktop, especially for your “Orphan” .mxf files.
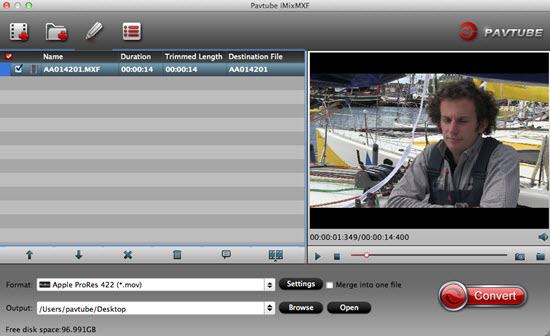 Step 2: Click the “Format” bar to choose the output format you want. In this case, the iMovie is our target format, which you can find iMovie on this software’s format bar list. Choose “iMovie and Final Cut Express>>Apple InterMediate Codec (AIC) (*.mov)” as output format.
 Tips: For FCP X output, choose “Final Cut Pro>>Apple ProRes 422 (*.mov)”.Step 3: If you want to stream your video clip to your Table or your phone so that you can enjoy them whenever and wherever you want, just choose the correct format your devices support. Or select brand name your device on the format list, such as Samsung, iPhone. Then you can enjoy the video without any quality drop or lagging.Step 4: After all have been settled, choose the output folder with enough storage space then hit “Convert” button to start your conversion.Conclusion: After the conversion, you can click the “Open output folder” to check your converted video. Then with these high quality and compatible format videos, just load them into FCP X/iMovie for editing or enjoy them on your mobile devices.Source: http://digisns.com/2014/12/convert-xavc-mxf-into-fcpx-or-imovie/Further Reading:
Summary: Maybe you have come across similar questions when importing Sony F55 XAVC to FCP for editing. Congratulations! What you’re reading is a quick and easy guide for solving the problem.
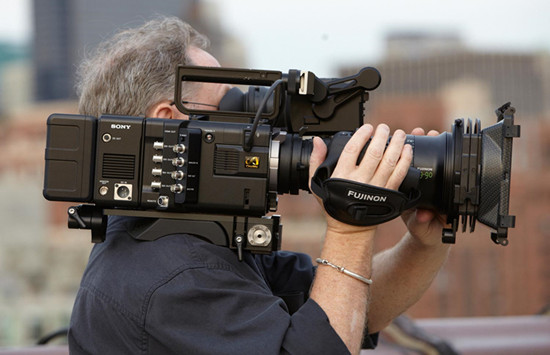 I'm a MD/producer/director exposure films ltd, I have recorde some videos TV, digital and commercial with my Sony F55. Since the XAVC footage from F55 is a peripheral non-standard format which is not supported by FCP. To edit my Sony PMW-F55 XAVC video in FCP with a simple way, I have to render to the third-party software to help convert XAVC to Apple ProRes 422 MOV– native format for Final Cut Pro.Then what is the best XAVC Converter to deal with my Sony F55 XAVC codec? I often use MPEG stream clip, it is awesome but doesn't support XAVC. Then I searched on the web and find an easy-to-use yet professional software called Pavtube HD Video Converter for Mac (review), it is only straightforward XAVC converter which offers the best way to help the users of PMW-F55 to edit Sony PMW-F55 XAVC in FCP smoothly by effortlessly and flawlessly transcode Sony XAVC footage to ProRes MOV. It is safe to install and easy to use. Below will show you how to transcode Sony PMW-F55 XAVC footage to ProRes MOV in details. Other Download:- Pavtube old official address: http://www.pavtube.com/hd-video-converter-mac/- Amazon Store Download: http://www.amazon.com/Pavtube-Video-Converter-Mac-Download/dp/B00QI9GNZS- AppStore Download: https://itunes.apple.com/de/app/pavtube-hd-video-converter/id502792488?mt=12- Cnet Download: http://download.cnet.com/Pavtube-HD-Video-Converter/3000-2194_4-76177786.htmlConvert/Import Sony PMW-F55 XAVC to Final Cut Pro for editing smoothly with Apple ProRes Codec on Mac.Step 1: Launch the HD Video Converter on your Mac, and then click the “Add video” button to import your XAVC videos from Sony F55 directly. In order to import several files at one time, you can click “Add from folder” button.
 Step 2: Click the “Format” bar to get the drop-down menu and you can get “Final Cut Pro>>Apple ProRes codec”, including ProRes 422, ProRes 422 (HQ), ProRes 422 (LT), ProRes 422 (Proxy) and ProRes 4444. Choose the proper one you want.
 Step 3: Press the “Settings” icon and you’d better set the video frame rate as 30fps, video size as 1920*1080 for editing Sony F55 XAVC in FCP easily.Step 4: Now, click "Convert" and let it go. The XAVC to FCP Converter for Mac supports batch conversion. So if you have lots of XAVC videos to convert, check “Shut down computer after conversion” and you can go away without keeping an eye on it.Tips: Before you try to do the conversion, if you are also a FCP user, please make sure that you have installed the Apple ProRes Codec manually since the FCP asks users to install it by themselves.Conclusion: Once the conversion process shows in 100%, click “Open” to get the output videos. Create a project and start Sony F55 editing XAVC videos in FCP with light speed.Source: http://handycameratips.jimdo.com/2013/12/04/load-xavc-files-from-sony-f55-to-fcp/Further Reading: