Monday, January 23, 2017

Blu-ray movies on QuickTime on Mac OS X El Capitan

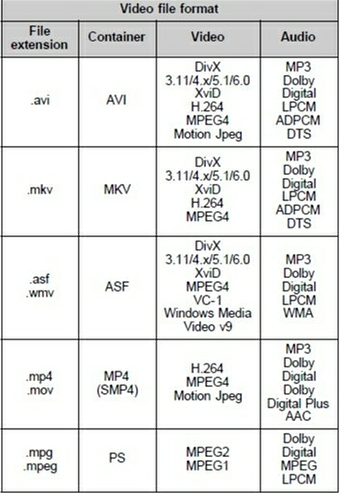
What is the first media player on Mac OS X El Capitan? Quicktime will be the one. Not because it is bundled with Mac OS X, just in that it's powerful media technology that works on Mac OS X El Capitan with just about every popular video or audio format you come across. Its playable audio and video formats just like the same sheet:


Although QuickTime supports many video formats, as we all seen, Blu-ray is not in the list. So if you have many Blu-ray movies, no matter from your paid Blu-ray discs or downloaded from internet, how do you watch Blu-ray movies on QuickTime Mac OS X El Capitan?

Pavtube BDMagic for Mac is exactly designed for this problem. This Blu-ray to QuickTime converter enables you to rip and backup Blu-ray to QuickTime playable formats at ultra fast time with high video quality. What’s more, it is updated to support the Mac OS X El Capitan and Yosemite 10.10. So you can rip Blu-ray on your Mac OS X El Capitanand Mac Yosemite 10.10/10.9. It also can play Blu-ray movies of region A, region B and region C.


Free download and install:


Other Download:
- Pavtube old official address: http://www.pavtube.cn/blu-ray-ripper-mac/
- Cnet Download: http://download.cnet.com/Pavtube-BDMagic/3000-7970_4-76177782.html

How to rip Blu-ray to QuickTime playable format?

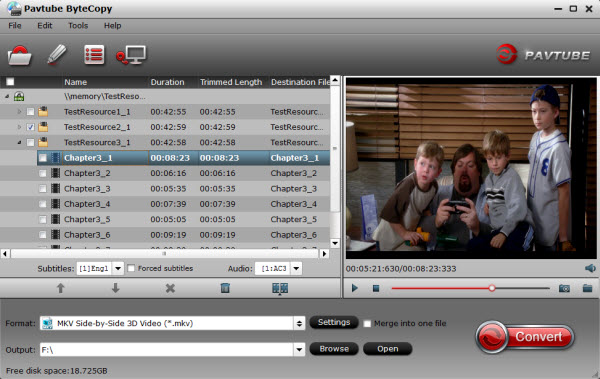
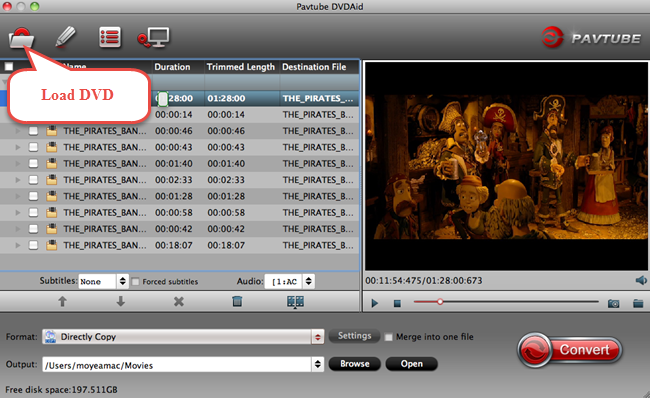
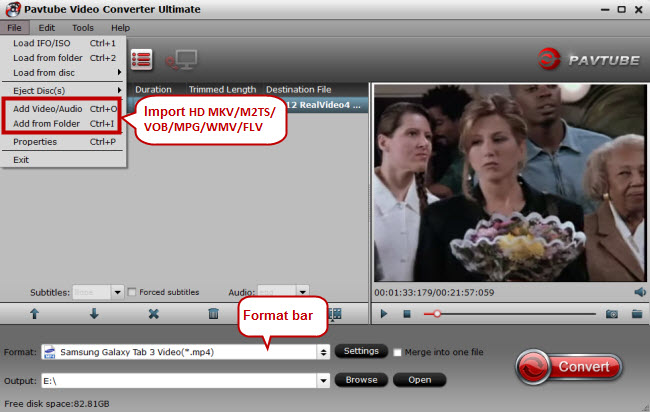
Step 1: Load Blu-ray movies

Click the "Folder" icon on the top menu bar to load your Blu-ray disc to the program


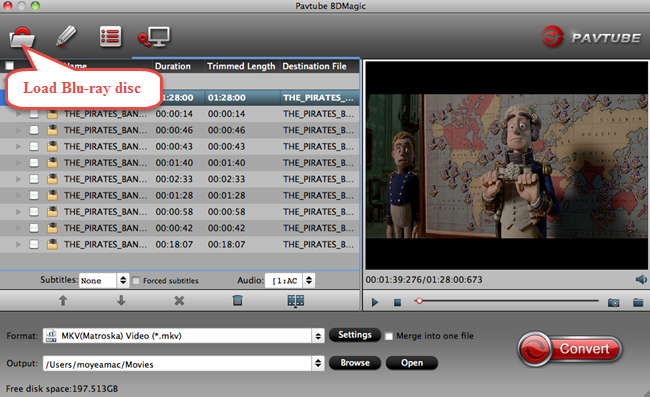
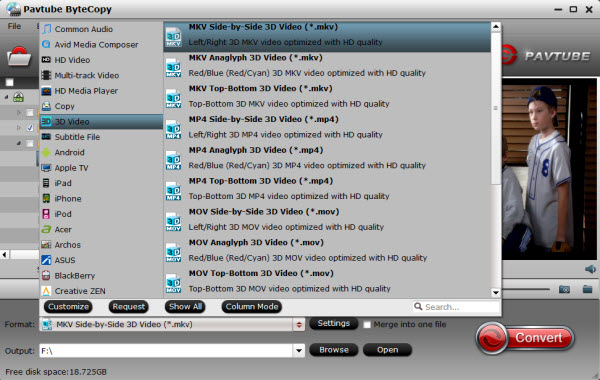
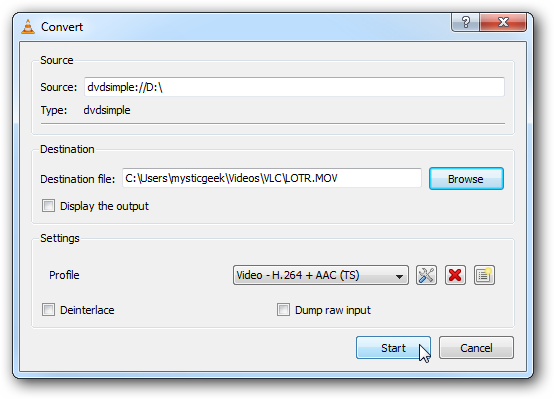
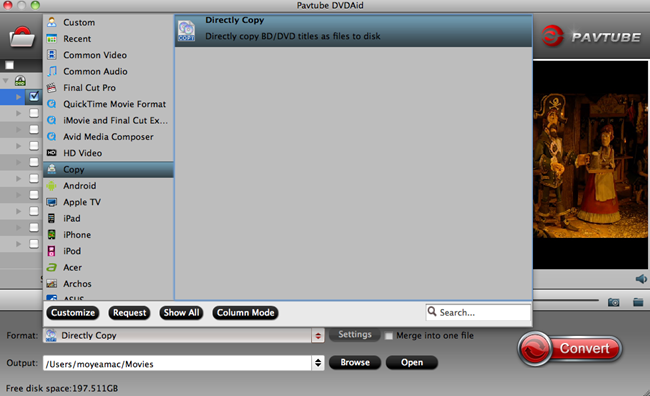
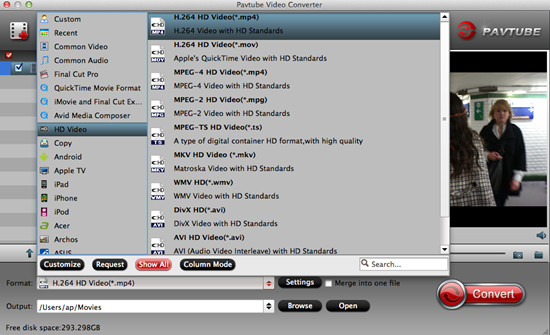
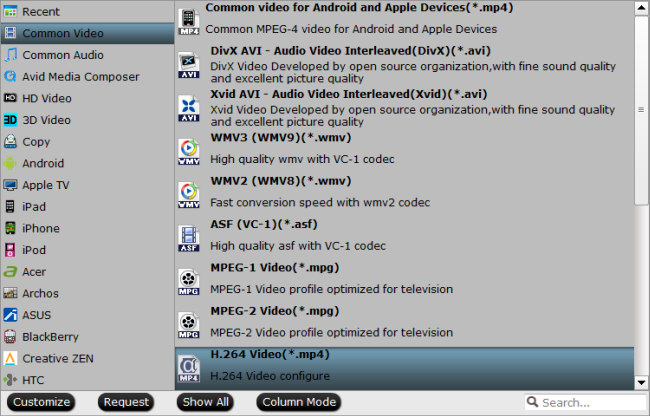
Step 2: Choose QuickTime MOV format

Click "Format" bar, from its drop-down selection, define "MOV-QuickTime (*.mov)" as the output profile format.


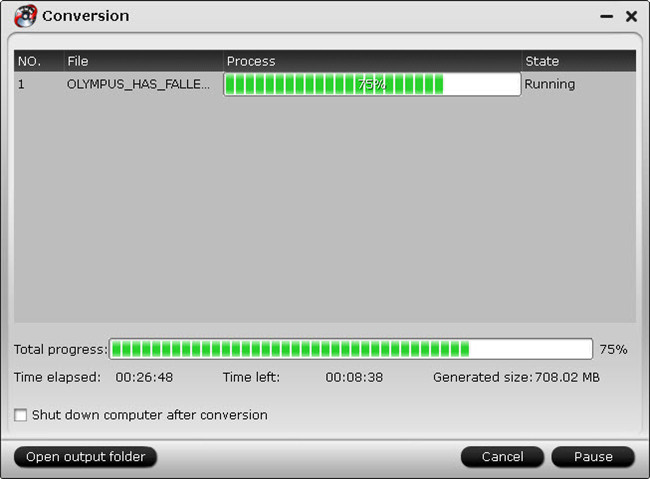
Step 3: Start to rip Blu-ray to QuickTime

Start to rip Blu-ray to QuickTime format process on OS X El Capitan by hitting the right-bottom conversion button. When the conversion is done, locate the ripped Blu-ray in the output folder.

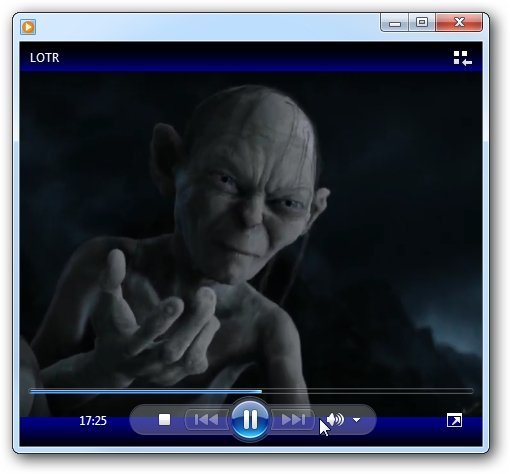
Now, you can freely enjoy your Blu-ray movies on QuickTime on Mac OS X El Capitan.

In addition, this Blu-ray Ripper actually can convert Blu-ray, ISO to H.265, M3U8, MP4, etc, for iPhoneiPad, Apple TV directly. Besides, it also has powerful function to extract FLAC audio

Source: http://2d-3d-movie-tips.blogspot.com/2015/07/watch-blu-ray-on-quicktime.html

Thursday, January 19, 2017

3D MKV movies to Rift CV1 on macOS Sierra/El Capitan

If you are the lucky ones who have tried these Rift CV1 on macOS Sierra/El Capitan, both in versions for the Rift CV1 to the recent macOS Sierra/El Capitan as well as 3D MKV movies to Rift CV1, sure you’ve fallen in love with the virtual reality with its endless possibilities. They open when live experiences, enjoy the games from completely new perspectives and, of course, when it comes to watching 3D MKV movies in the famous film that comes standard with the glasses. On the other hand, just like other devices, Rift CV1 users are also likely to experience various technical problems, especially when playing 3D MKV videos 3D effects. One of the common problems you might often experience is "Audio missed" or "Unsupported errors". If you don't have any idea of how to fix these problems, just read on for details. 

A very common problem macOS Sierra/El Capitan users ave is playing 3D MKV movies. When you Mac tried to open 3D MKV files on Mac to Rift CV1, you'll commonly receive an error message along the lines of this is not a movie file. Actually, Rift CV1 doesn't support the MKV or HD MKV files natively. This gets really annoying if you come across a 3D MKV file and want to watch it on your Mac. Fortunately, there are a lot of options to help you play an 3D MKV file in the macOS Sierra/El Capitan. 

In fact, 3D MKV files in 3D SBS(Side-by-Side) work on Rift CV1, but the audio has to be encoded in AAC or MP3 for stereo. AC3 and DTS were removed because of high licensing costs. You can either wait till a developer brings a Rift CV1 VR player which supports also custom codecs or you can convert your video files to ACC audio or root your phone and add codecs for AC3/DTS. However, the easy and effective solution is to re-encode your 3D MKV files to Rift CV1 more compatible format to get them play nicely.  Pavtube ByteCopy for Mac  is the bee's knees, which can help you easily solve the 3D MKV 
and Rift CV1 no sound problem. 

Overall, the program is a professional 3D MKV Video Converter, which comparatively has better output quality, in particular HD videos and intuitive interface. With it, you can fast convert MKV to Rift CV1 supported file type like MP4, MKV in .mp3, .aac audio. Best of all, this software allows you to convert 3D MKV to 3D videos such as MKV Top-bottom 3D Video, MP4 Top-bottom 3D Video, MP4 Side-by-Side 3D video (See The Differences Between SBS 3D, Anaglyph 3D and Top/Bottom 3D ) , which can be played on Rift CV1 perfectly. If you are Windows users, please turn to  
Pavtube ByteCopy  for Windows. Now, we will give a detailed guide on the whole process from converting 3D MKV to Rift CV1 supported video. 

The Best 3D MKV Movies converter Tool: 


Other Download:
- Pavtube old official address: http://www.pavtube.cn/bytecopy/
- Cnet Download: http://download.cnet.com/Pavtube-ByteCopy/3000-7970_4-76158512.html

How to convert MKV to Rift CV1 supported format without quality loss 

Step 1. Load movies files to the software 


You can either click "Add" button to import MKV files you want to upload to YoubTube. Also you can directly drag and drop the files into this program. 

ISO to MKV Ripper

Step 2. Select the 3D MKV as output format 

Click "Profile" and find "3D Video". there are a lot of format options for you. Here you can recommended to select MP4-3D or MKV-3D as the output format. 

SBS 3D MKV video

Step 3. Specify video/audio parameters 

Click Settings button to adjust video/audio parameters like video resolution, bitrate, audio codec, audio channel. According to my experience, anything over 720p does nothing but turn battery energy into heat, due to the screen resolution. 

3D SBS MKV settings

Step 4. Start encoding 3D MKV to Rift CV1 

Click Convert button to start converting 3D movies MKV to Rift CV1 friendly video. After the conversion, you can get the resulted videos by clicking the Open button.


Tips: Add 
3D MKV movies on Rift CV1 watching

To watch your 3D MKV movies on Rift CV1, however, there is an additional step, and it's not entirely straightforward.

The following will allow for perfect 3D playback of videos set up in a SBS format. SBS format means the left and right video channels are contained within the same file and appears as a near-mirror image when played back using a standard media player. To view your SBS 3D video files on your 
Rift CV1, follow these steps:

1. On your MicroSD card file directory, navigate to Oculus > Movies > Your Movies
2. Create a new folder within "Your Movies" and label it "3D"
3. Import or move your SBS 
3D MKV movies into your newly created "3D" folder

Once you have created your 
3D MKV movies and imported compatible video files, insert your MicroSD card into your phone (if it isn't already), slide the phone in your Rift CV1, and put the virtual reality headset on your head. Then:

1. Navigate to 
Rift CV1 from the main menu
2. Navigate to "My Videos" from the 
Rift CV1 content library menu
3. Select the 3D video you wish to view (if you followed the above steps it should have a "3D" label in the upper righthand corner)
4. Choose the cinema mode to begin playback

Related Article and Tips: 

Remove Disney X-project DRM DVD on Windows 10/Yosemite
How to Get all DVDs into Synology NAS drive for Streaming
How to Backup Disney Copy-Protected DVD Discs for watching
Watch 3D Movies on Mobile Device using a VR Theater application
Watch YouTube 3D Videos on Sony BRAVIA HD TV
Ripping TV series DVDs to PC
Copy 2016 hot Blu-rays to NAS for HD 4K TV or Normal def TV streaming
Enjoy free and smooth Blu-ray playback on Galaxy S7/S7 Edge
Can I Store iTunes Movies to An External Drive to play in LCD TV?
Top 3 3D Video Converters for Mac El Capitan 10.11.1/10.11.2
2016 Best 3 DVD Ripping Software
Backup and Put Blu-rays to Synology DS416slim NAS on Mac
How to Get AVCHD MTS Workflow with DaVinci Resolve (Lite)?
Best Software for ripping Blu-ray Audio to FLAC on Mac OS X
2D 3D Movie Tips: The best way to convert all 2D videos to 3D SBS MP4.
Copy Blu-ray to DESTEK Vone 3D VR Headset 


Source:http://2d-3d-movie-tips.blogspot.com/2016/08/3d-mkv-movies-to-rift-cv1-macos-sierra.html

Monday, January 16, 2017

Rip and copy DVD to VLC on Mac OS X

How to rip and copy DVD to VLC on Mac OS X is an everlasting and hot issue in all relevant digital copy, video conversion forums and bulletins. Backing up DVD to VLC means that you can enjoy your favorite DVD videos on computer conveniently and can protect your physical DVD disc from scratching. That’s why many people choose to transfer DVD to VLC on Mac OS X. Here, this article will show you two methods to play DVD on VLC: Method one, rip DVD with VLC on Mac OS X; Method two, copy DVD to VLC with VLC Alternative on Mac OS X.

Method one: How to rip DVD with VLC Media Player on Mac OS X El Capitan?

VLC is not just a media player. It allows you to rip your DVD as well. Here we will show you how to rip DVD movies with VLC. (Note : This tutorial is written for VLC 0.9.6 and up).
Step 1: Start up VLC on Mac and load up DVD video. Under “Media”, click on “Convert/Save”
Step 2: When Open Media window appears, click DVD tab and browse the Disc device to make sure the field is pointing to the optical drive. Then navigate to “Convert/Save’

Step 3: Next the Convert screen opens where you can select a location for the ripped file.


Step 4: Give the file a name and a supported extension. For this example we ripped Lord of the Rings and gave it a MOV extension. If you don’t label it with a supported file extension it will default to .ps (Program Stream) file.

Step 5: When all settings are done, the Convert screen will look something like this where we have the source drive and destination file with appropriate extension.

Finally, You should be able to play the converted file with other media players assuming you have the right codec.

Using VLC to rip DVD on Mac OS X takes too much time. And you will notice the converted movie in lower quality compared to the original. Also, VLC does not support the DVD with internal encryption so that it can’t recognize protected DVD well and fail to extract movies from DVD successfully. In this case, you have to turn your eyes to VLC Alternative to solve the problem.

Method two: How to copy DVD to VLC with VLC Alternative on Mac OS X El Capitan?

Pavtube DVDAid for Mac is recommended as VLC Altenative, which can 1:1 backup DVD protected without lossless quality. It enables you to rip DVD to VLC on Mac OS X El Capitan in H.265, M3U8,VOB, MP4, MKV, MOV, AVI, DivX, etc, at fast speed. Not like VLC, it continuously upgrades with new decryption technology for new released DVD. And it can support the newest Mac OS X system, like El Capitan, Yosemite 10.10/10.9.

Free Download and Install DVD Ripper for Mac OS X El Capitan


How to rip DVD to VOB for VLC on Mac OS X El Capitan


Step 1. Import DVD to the app

Run Pavtube DVDAid on your Mac, and load your DVD disc by clicking the “File” icon and this process only takes you a few seconds.

Step 2. Copy DVD main movie

Click the format bar to follow “Copy” and “Directly copy”. Directly copy allows you to copy the main movie from your DVD disc without extras. If you want your converted DVD supported by more devices, take a try with other popular video formats suitable for your device. Please kindly note that Pavtube trial version only supports 6-time directly copy.
dvdaid for mac vob format

Step 3.Start DVD to VOB conversion

Click the red button “Convert” on the main interface to start conversion from DVD to VLC on Mac OS X El Capitan. It will pop up a conversion window indicating the conversion progress from DVD to VOB.
Both of the two method can achieve the process of DVD to VLC on Mac OS X El Capitan. Nevertheless, the latter method obviously is easier than the former one. and it has much faster DVD ripping speed than DVD ripping with VLC. What’s the most important, ripping DVD to VLC on Mac OS X El Capitan with VLC Alternative can reserve the original video quality. Now, you can smoothly enjoy DVD on VLC.
In addition: With Pavtube ByteCopy for Mac, you can backup DVD to multi-track MKV for VLC on Mac OS X El Capitan with subtitles and audio tracks well preserved.

Source:http://2d-3d-movie-tips.blogspot.com/2015/10/rip-dvd-to-vlc-on-el-capitan.html

Wednesday, January 11, 2017

Tricks for Downsizing GoPro Hero 4K Video to 1080p

Summary: Are you troubled with how to downsize GoPro Hero 4K video to 1080p for playback and editing? Sometimes, 4K video can’t be played properly most likely your computer is not able to process the data of the large HD files fast enough. Check out the tips below.


Hot search: GoPro Hero 4K video to DropBox | GoPro Hero 4K video to Sony Movie Studio | GoPro Hero 4K video to Vimeo | GoPro Hero 4K video to VLC | GoPro Hero 4K video to Pinnacle Studio 

We know that GoPro Hero cameras can capture professional-quality videos, for example Hero3 White can capture 1080p 30fps video, Hero3+ Silver can capture gorgeous 1080p 60fps video, Hero4 can take time lapse videos with high data rates, Hero4 Black can shoot incredible high-resolution 4K 30fps and 2.7K 60fps video and the high frame rate 1080p 120fps video. 

What is the difference between 1080p and 4K resolution? 
A High Definition TV with 1080p resolution is composed of two million pixels (1920*1080), while a 4K TV (aka Ultra High Definition) has over eight million pixels (3840*2160). Therefore, 4K has around four times more resolution than 1080p and produces a clearer picture. 

As we know, the majority of playback, editing work is still being finished in 1080p. In most cases, we still need to downscale most of the 4K video files to 1080p. In fact, you may not see any real differences if you're not doing much to the footage. One of the huge benefits to 4K, that you can do a lot to the image and retain detail for a beautiful 1080p finish. For those who wanna play and edit GoPro Hero 4K videos on old computer (playing a 4K video requires more computing power and it could be more time consuming), we suggest you to convert all GoPro Hero 4K videos to 1080p then play in 1080p and smart-render. 

Best solutions to downscale GoPro Hero 4K video to 1080p: 
Although there are numbered tools and utilities can convert and compress the ultra HD videos, few of them can process at a fast speed. Well, Pavtube Video Converter for Mac is considered to be the best 4K to 1080p converter. It is surely in the support of compressing GoPro Hero 4K videos to 1080p faultlessly. For Windows users, Pavtube Video Converter is the alternative choice. 


Other Download: 

- Pavtube old official address: http://www.pavtube.com/video_converter/ 
- Cnet Download: http://download.cnet.com/Pavtube-Video-Converter/3000-2194_4-75734821.html 
- Softonic Download: http://pavtube-video-converter.en.softonic.com/ 
- Soft32 Download: http://pavtube-video-converter.soft32.com/ 
- Top4download: http://www.top4download.com/pavtube-video-converter/oglsvigp.html 
- Softpedia Download:http://www.softpedia.com/get/Multimedia/Video/Encoders-Converter-DIVX-Related/Pavtube-Video-Converter.shtml 
- Instaluj Download: http://www.instaluj.cz/pavtube-video-converter 
- Windows7download:http://www.windows7download.com/win7-pavtube-video-converter/ymuimxah.html 
- Softonic Download:https://pavtube-video-converter.en.softonic.com/ 
- FullprogramDownload: https://www.fullprogramlarindir.com/pavtube-video-converter-full-4-6-0-5344-indir.html 
- Eurodownload: http://www.eurodownload.com/download-software/169809/1A-Pavtube-Video-Converter.html

How to downsize GoPro Hero 4K video to 1080p? 

Step 1: Download and have a quick installation. The trial version will have a watermark on your converted files. Except for that, there are no time limitation, no virus, and no unnecessary bundle apps while downloading. After that, click “Add Video” button to load your GoPro Hero 4K videos. You can load several files at once thanks to “Add from folder” button. 


Step 2: Click the “Format” drop down list to select output format. If you want to play GoPro Hero 4K videos on decent media player, you’d better set a preset profile that best meets your needs. For instance, if you want to play GoPro Hero 4K videos on VLC smoothly, “HD Video>>H.264 HD Video (*.mp4)” would be the best choice. 


Step 3: Click “Settings” button; you can adjust video and audio settings, including codec, aspect ratio, bit rate, frame rate, sample rate, and audio channel. To down-convert ultra HD 4K to 1080p, do remember adjusting video size to 1920*1080. That is the exact 1080p. 

Step 4: At the end, hit “Convert” button to let the 4K to 1080p conversion begin. 

Conclusion: When the conversion finished, check the generated 1080p video, you will certainly be satisfied with its final video quality. It would be easier for you to playback and edit. 
Read More Tips About DJI
Source: http://pc-mac-compatibility-issues.blogspot.com/2015/07/downsize-4k-video-to-1080p.html 

Monday, January 2, 2017

Play AVI on Sharp TV Via USB/Exterbnal

Sammary: In this guide, we will show you how to play AVI files on Sharp TV via USB/External drive,playing the movie on to your computer if you prefer to keep the digital instead. 

Have you stored some AVI videos on External drive or USB Flash drive? Do you want to play AVI files on Sharp 4K TV from USB port? What kind of TV converter we can use on Windows/Mac ? How to send the converter files to Sharp 4K TV? May be found in this article good advice to you. 

When you play movies on sharp 4K TV through USB or External drive, the TV said the format is not supported by sharp 4K TV. In this time you maybe want to known what should we do to solve this problem. 

Reason to Sharp TV Can’t Play AVI files 

At the first what format files on Sharp TV supported: 


According to this, it supports AVI as well as MP4, MOV, MKV, WMV, MPG. But Sharp TV AVI in Divx/Xvid video codec and MP3 Audio codec. However, AVI format is a container format which has many different video and audio codecs, your Sharp TV will failed to play unsupported AVI files due to the video/audio codec limitation. So, how to smoothly play any AVI videos on Sharp TV from USB or External Drive? 

Note: You can know the video codec, audio codec, frame, size... of AVI video via MediaInfo

How to Play Unsupported AVI on Sharp TV via USB or External drive? 

To break the format restrictions for Sharp TV, you just need to convert Unsupported AVI files to be support by Sharp TV with a third party software. Pavtube Video Converter Ultimate is higher recommended for you, which is a powerful video player, editor, and conversion tool for Windows and Mac. With it, you can re-encode any AVI videos to Sharp TV supported AVI Files with Divx/Xvid video codec and MP3 audio codec or Sharp TV supported MP4 format with H.264 video and MP3/AAC audio codec (The best format for Sharp TV is MP4 format.). And then you won’t have any playback problems. 

Plus, Pavtube Video Converter Ultimate focuses on ease of use, converting your chosen video with the absolute minimum of hassle. It's great at transcoding, but it's also a great organizational tool for all of your video and audio, such as: H.265, MKV, MP4, MOV, WMV, MPG, Tivo, Blu-ray/DVD movies and ISO image files etc. It's very fast, flexible and safe. 

Nutshell, the TV Converter gets the job done and can convert just about anything to just about anything else quickly, easily, and without complaining—and that's what's important. 

Now, you can free download it as a try 


Other Download: 
- Pavtube old official address: http://www.pavtube.cn/blu-ray-video-converter-ultimate/ 
- Cnet Download: http://download.cnet.com/Pavtube-Video-Converter-Ultimate/3000-2194_4-75938564.html 

Following our exhaustive tests, Pavtube Video Converter Ultimate is the applications we feel performed the best. 

This program has every tool and feature we looked for in the best video converters. It has a healthy selection of both common(AVI, MKV, MP4, VOB, MPG, Tivo, WMV, etc.) and uncommon video formats(H.265, XAVC, Prores, etc.), and the converted video was as close to perfect as can be reasonably expected for Sharp TV. The most impressive aspect of this video converter is how quick it is as well as lossless quality output. The whole workflow is very easy to use for beginner. 

How to Re-encode Unsupported AVI to Sharp TV Supported formats? 

Step1: Load files 

drag AVI files to the software interface to import the file, batch conversion is supported so you can add multiple files to convert at a time. 


Step 2.Set output format for Sharp TV 

Clicking the Format bar, Click Format bar to select a proper format like MP4 or AVI format(with H.264 video and MP3/AAC audio codec )from HD Video profile, which can be viewed on Sharp TV perfectly. 


Step 3: Additional bonuses 

Attach SRT, ASS, or SSA subtitles into original video to create the personal movie for watching. If you want add Subtitles(srt, ass, ssa) to your movie for playing on Sharp TV. (Subtitle FAQs)You also can adjust aspect ratio, bit rate, etc. 


Step 4:Start conversion press 

Convert button on the main interface to start converting AVI files to Sharp TV/USB supported format. With NVIDIA CUDA and AMD APP technology, you can enjoy a faster video conversion. 


Now you can play any AVI videos from UBS on Sharp TV and enjoy. 

3 Ways to Stream Videos from PC to Sharp TV 

Method 1. Data cable connection 

Transfer your window has been converting formatted files on the USB or SD ports then plug in USB or SD ports on Sharp TV. 

Method 2. Wireless screen casting system 

Using wireless screen casting system that allows you to mirror your phone's screen on your high definition, smart Sharp TV. 

Method 3. Mobile Apps 

Setting up the connection is established, how do you make everything work well. To send the converter files to Sharp TV. Be carefully, a missed step in the initial configuration may result in the failure to connect with your Sharp Smart TV. 

Additional Tips

If you’re Apple users, Media Player for Sharp TV app also is recommended to you. Simply download this app to play videos, photos and music directly from your iPhone/iPod device to your Sharp TV. 

Related articles 
Source: http://2d-3d-movie-tips.blogspot.com/2016/04/play-avi-files-on-tv-via-usb.html