Summary: All in all, to smoothly import Sony PXW-X320 XAVC files to FCP 6/7, you'd better to convert X320 XAVC to FCP 6/7 totally compatible Apple ProRes MOV format.  The PXW-X320 supports XAVC offering high quality content creation in the HD domain. In addition to XAVC, MPEG HD422, MPEG HD, MPEG IMX, and DVCAM are supported. Two HD/SD-SDI, HDMI, i.LINK, and composite outputs provide a wide range of AV and IT interfaces. However, if we want to import the XAVC videos from Sony PXW-X320 to FCP 6/7 for editing, you may find the high quality XAVC files are not recognized by FCP. While enjoying the stunning video quality, many folks are having problems when importing Sony PXW-X320 XAVC to FCP 6/7 like the below: "We shot a video using PXW-X320 and now when we are trying to import the XAVC files into FCP 7, but we are getting an error that says that there may be no codec for FCP 7." "Importing Sony PXW-X320 XAVC to FCP 6 isn't working, it gives us an error." Well, in fact, it’s not a "fresh" problem we’ve met when getting XAVC clips into Final Cut Pro. So what's the available workflow for Sony PXW-X320 and FCP? Although Sony itself generates plug-ins like XAVC/XDCAM Plug-in for Apple (PDZK-LT2) to enable FCP ingest Sony XAVC files correctly. However, the plug-in requires Final Cut Pro X 10.1 or later, that means if you want to import XAVC to FCP 6/7, it won’t work. Besides, you’ll need to a powerful Mac to edit the highly-compressed XAVC footage in FCP. So to transfer XAVC files from Sony PXW-X320 to FCP 6/7, a suggestion is to convert XAVC to ProRes which Final Cut Pro works best with. Pavtube HD Video Converter for Mac (review) is the solid tool to help users achieve the goal, applying which you are capable of converting XAVC to Apple ProRes format with lossless quality at faster speed so that you can edit Sony X320 XAVC in FCP 6/7 without any problem. Besides, the program is developed with some useful editing features, including merging several clips into one for easy importing,downsizing the files for editing and storage, adding text/image/video to original files, adding subtitles, replacing original audio tracks, etc.
 Other Download: - Pavtube old official address: http://www.pavtube.com/hd-video-converter-mac/ - Amazon Store Download: http://www.amazon.com/Pavtube-Video-Converter-Mac-Download/dp/B00QI9GNZS - AppStore Download: https://itunes.apple.com/de/app/pavtube-hd-video-converter/id502792488?mt=12 - Cnet Download: http://download.cnet.com/Pavtube-HD-Video-Converter/3000-2194_4-76177786.html How to convert Sony PXW-X320 XAVC to ProRes 422 for FCP 6/7 editing on Mac? Step 1: Download and have a quick installation. The trial version will have a watermark on your converted files. Except for that, there are no time limitation, no virus, and no unnecessary bundle apps while downloading. After that, click "Add Video" button to load XAVC video. You can load several files at once thanks to "Add from folder" button.
  Step 2: Click the "Format" bar to get the drop-down menu and you can get "Final Cut Pro>>Apple ProRes 422 (*.mov)" as output format.
  Step 3: Click "Settings" button to customize the output video and audio settings by yourself. But if you are not good at it, you’d better use the default parameters, they will ensure you a good balance between file size and image quality basically. You can change the resolution, bit rate, frame rate as you need. Step 4: Click "Convert" button on the bottom of the screen to start XAVC to ProRes MOV conversion process. The amount of time it takes will vary based on your system’s hardware and the quality settings you selected. Conclusion: When the conversion is done, you can click "Open" button to get the generated video files. Now, you can edit Sony PXW-X320 XAVC in FCP 6/7 freely. Further Reading:
Source: http://pc-mac-compatibility-issues.blogspot.com/2015/07/work-with-xavc-in-fcp.html
Step 3: Click "Settings" button to customize the output video and audio settings by yourself. But if you are not good at it, you’d better use the default parameters, they will ensure you a good balance between file size and image quality basically. You can change the resolution, bit rate, frame rate as you need. Step 4: Click "Convert" button on the bottom of the screen to start XAVC to ProRes MOV conversion process. The amount of time it takes will vary based on your system’s hardware and the quality settings you selected. Conclusion: When the conversion is done, you can click "Open" button to get the generated video files. Now, you can edit Sony PXW-X320 XAVC in FCP 6/7 freely. Further Reading:
Source: http://pc-mac-compatibility-issues.blogspot.com/2015/07/work-with-xavc-in-fcp.html
If you attempt to edit Sony A5100 XAVC S files in FCP X, the following article may help you a lot in importing Sony A5100 XAVC S files to FCP X conveniently. What’s more, with the best supported video formats for FCP X, we will know about how to enjoy any format videos edit in FCP X.  The newly released Sony A5100 has won lots of attractions from videographers. The camcorder has an extremely efficient recording codec XAVC S, allowing for bit rates of 50Mbps. It also has the ability to simultaneously record 720p video while recording at higher resolutions. While, there are a few issues when it comes to viewing, loading and editing Sony A5100 XAVC S files in non-linear editing software like Final Cut Pro X. Now some tips and tricks for Sony A5100 XAVC S to FCP X best workflow are listed below. As you can see above, the Sony A5100 can record videos in XAVC S, AVCHD and MP4 formats, all of them are not native formats for Final Cut Pro editing. As far as I know the latest high definition XAVC/XAVC S video format introduced by Sony is still not supported well by FCP X/7/6. From Apple FCP official page you will get the info that Apple ProRes codec is the native codec for FCP X, once you convert video to Apple ProRes codec you can import the video to FCP X for editing smoothly, and you don’t need to render anymore. To achieve our goal, the quickest and easiest way is to use the easy-to-use yet professional software called Pavtube HD Video Converter for Mac, with which we can effortlessly and flawlessly transcode Sony XAVC S footage to ProRes MOV for FCP X. It is safe to install and easy to use. Below I will show you how to convert Sony A5100 XAVC S footage to ProRes MOV for FCP X in details. Other Download: - Pavtube old official address: http://www.pavtube.com/hd-video-converter-mac/ - Amazon Store Download: http://www.amazon.com/Pavtube-Video-Converter-Mac-Download/dp/B00QI9GNZS - AppStore Download: https://itunes.apple.com/de/app/pavtube-hd-video-converter/id502792488?mt=12 - Cnet Download: http://download.cnet.com/Pavtube-HD-Video-Converter/3000-2194_4-76177786.html A step-by-step guide for you to learn how to edit Sony A5100 XAVC S files in FCP X: Step 1: Launch the Sony A5100 XAVC S Video Converter on your Mac, and then click the "Add video" button to import your XAVC S videos from Sony A5100 directly. In order to import several files at one time, you can click "Add from folder" button.
  Step 2: Click the "Format" bar to get the drop-down menu and you can get "Final Cut Pro>>Apple ProRes codec", including ProRes 422, ProRes 422 (HQ), ProRes 422 (LT), ProRes 422 (Proxy) and ProRes 4444. Choose the proper one you want. Here, we suggest you to choose Apple ProRes 422 .mov as the best output format.
  Step 3: Press the "Settings" icon and you’d better set the video frame rate as 30fps, video size as 1920*1080 for editing Sony A5100 XAVC S files in FCP X easily. Step 4: Now, click "Convert" button and let it go. The Sony A5100 XAVC S Video Converter for Mac supports batch conversion. So if you have lots of XAVC S videos to convert, check "Shut down computer after conversion" and you can go away without keeping an eye on it. Conclusion: Once the conversion process shows in 100%, click "Open" to get the output videos. Create a project and start Sony A5100 editing XAVC S files in FCP X with light speed. Further Reading:
Source: http://handycameratips.jimdo.com/2015/04/13/edit-xavc-s-in-fcp-x/
Step 3: Press the "Settings" icon and you’d better set the video frame rate as 30fps, video size as 1920*1080 for editing Sony A5100 XAVC S files in FCP X easily. Step 4: Now, click "Convert" button and let it go. The Sony A5100 XAVC S Video Converter for Mac supports batch conversion. So if you have lots of XAVC S videos to convert, check "Shut down computer after conversion" and you can go away without keeping an eye on it. Conclusion: Once the conversion process shows in 100%, click "Open" to get the output videos. Create a project and start Sony A5100 editing XAVC S files in FCP X with light speed. Further Reading:
Source: http://handycameratips.jimdo.com/2015/04/13/edit-xavc-s-in-fcp-x/
Summary: A quick and easy solution to make your XAVC/XAVC-S video compatible with EDIUS Pro 7/8 with the maximum editing quality and efficiency.  Sony had expanded XAVC to the consumer market with the release of XAVC S, which supports resolution ups to 3840*2160 with MP4 container format and AAC or LCPM for the audio. The XAVC S format has been used in the Sony FDR-AX100 4K Ultra HD consumer camcorder and Sony HDR-AS100V action camera. The Sony A7S as well as some consumer stills camera with movie support also offer XAVC S. Sony XAVC/XAVC-S camera and camcorder models: PMW-F55, PMW-F5, PWM-400, PMW-300, PXW-X180, PXW-Z100, FDR-AX1, FDR-AX100, Alpha A7S, HDR-AS100V The latest version of EDIUS vesion 7.41 and its later version supports all types of XAVC and XAVC-S. But for its former versions such as EDIUS Pro 6.5 or, people will often complained that they get only audio but no video files when importing the XAVC video footage to EDIUS Pro for editing. This error can be caused by the unrecognized codec contained in your XAVC video footage. To solve above mentioned problems, you will need to transcode or rewrap the video files that you are going to edit with EDIUS Pro 7/8 into one single file format or codec that can be easily recognized by EDIUS Pro 7/8 as below: Video format: 3GPP, AVCHD, AVC-Intra (4K 444/4K 422/4K-LT/200/100/50), AVC LongG, AVI, DIF stream, DVCPRO(DVCPRO HD/50/25), Flash Video, MPEG HHD MOVIE, MPEG Program Stream, MPEG Transport Stream, MPEG Video Stream, MPEG File, MXF, P2 Clip File, QuickTime Movie, RED File, SONY HVR-DR60/HVR-MRC1 Meta File, Transport Stream (MPEG2, H.264), Windows Media*1, XAVC, XAVC-S, XDCAM, XDCAM EX, XF Clip File. Audio format: AAC Files, AIFF Files, Dobly Digital (AC-3), Dobly Digital (AC-3) (for professional), MPEG Audio Layer-3, MPEG Audio Stream, Ogg Vorbis Files, Wave Files, Windows Media Audio. After multiple testing, I found Pavtube Video Converter is the best option. It is able to convert XAVC/XAVC-S to EDIUS Pro 7/8 friendly format easily with the best video quality. Besides XAVC/XAVC-S, this video convert program can also help to convert between any popular video and audio formats as you need. Plus, with the built-in video editing feature of the program, you can trim, crop, add watermark and more to your video files.
 Other Download: - Pavtube old official address: http://www.pavtube.com/video_converter/ - Amazon Download: http://download.cnet.com/Pavtube-Video-Converter/3000-2194_4-75734821.html - Cnet Download: http://download.cnet.com/Pavtube-Video-Converter/3000-2194_4-75734821.html How to import XAVC/XAVC-S to EDIUS Pro 7/8? Step 1: As soon as you download and install the program, launch it and when the main interface pops up in front of us, just click the “Add Video” or “Add from Folder” to let in.
 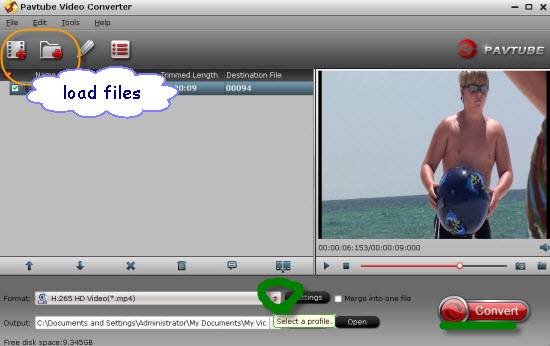 Step 2: Click the drop-down list in the format line to get the format box. Then choose “Adobe Premiere/Sony Vegas>>MPEG-2 (*.mpg)” as output format.
  Step 3: Click “Settings” button to customize the output video and audio settings by yourself. But if you are not good at it, you’d better use the default parameters, they will ensure you a good balance between file size and image quality basically. You can change the resolution, bit rate, frame rate as you need. Step 4: After that, click “Convert” to start XAVC/XAVC-S to EDIUS Pro 7/8 conversion. Conclusion: After conversion, you can get the generated files by clicking “Open” button. Now, you’ll get no troubles in editing XAVC/XAVC-S file in EDIUS Pro 7/8.
Further Reading:
Source: http://camcordervideoshare.altervista.org/blog/edit-xavc-xavc-s-in-edius-pro-7-8/
Summary: M3U8 format was added into this powerful Video Converter. Detailed review about this converter you can find in this article.  The M3U8 file extension is used for playlists that are stored in the M3U UTF-8 (Unicode) text playlist format. M3U and M3U8 playlists can be opened in a variety of media players, such as Winamp, KMPlayer, iTunes, VLC media player etc. Playlist doesn’t contain any multimedia content, it is only list of media files selected from a hard disk or other media. You may get many different files from Internet, camcorder shooting and etc. Take the newly H.265 as an example: The big trend of 4K put an eager need for higher shooting quality, fast playback , powerful stream function. H.265 just came as a best connection between the 4K generation and video making equipment. Many giant Digital Company like Sony, Canon, and Panasonic all pursuit this latest trend. They all launched their 4K camera in order to size the market. The H.265/HEVC used by those HD Camcorder or Camera would be the best solution to compress those high resolution video into small size while maintain the sharp quality. Got these fantastic videos at hand, how to play them smoothly without waiting for the buffering time? Here, you need to convert your files like H.265 to M3U8, the format we mentioned at the very beginning. The advantage is that dragging videos is fast because of no extra datas. You can drag the video to any point you want to enjoy smoothly and immediately. Besides, the original supporting effect is good. Using an M3U8 Converter thus offers a neat advantage for both video producers and video consumers who will certainly be wowed. This is great news for producers of video who want to maximize quality and minimize costs. Online commercial distribution of video will certainly be less expensive on the storage side and highly interesting in terms of video supply variety, especially for businesses offering video-on-demand services. Here strongly recommend this all-in-one brand new Pavtube Video Converter, which is top-ranked M3U8 Converter for Windows. Other Download: - Pavtube old official address: http://www.pavtube.com/video_converter/ - Amazon Download: http://download.cnet.com/Pavtube-Video-Converter/3000-2194_4-75734821.html - Cnet Download: http://download.cnet.com/Pavtube-Video-Converter/3000-2194_4-75734821.html How to convert video files to M3U8 format on Windows? Step 1: Download and install the program. Click "Add video" on the main interface to load your files to the program. You can also drag the files to the program’s window list directly. This program can also support the batch video clips.
  Step 2: Click the "Format" bar to get the drop-down menu and you can get "HLS Streaming (m3u8)". Choose "ipad m3u8 streaming" or "iphone m3u8 streaming" as best output format. Any media player supporting TS format are all available for playing M3U8 format files.
  Step 3: Click "Settings" button to customize the output video and audio settings by yourself. Video codec is the default H.264 and audio codec is the default AAC. You can change the resolution, bit rate, frame rate as you need. But if you are not good at it, you’d better use the default parameters, they will ensure you a good balance between file size and image quality basically. Step 4: When everything is done, you can take a preview by hitting "Play" button. If you are satisfied with the final result, you can click "Convert" button to finish the conversion work. Conclusion: The output files should be named without space and file path should be in plain English or pure digital, or you could play them successfully. After conversion, you can set up a server to enjoy M3U8! Hope this top-ranked M3U8 Converter can help you a lot! By the way, Pavtube Video Converter Ultimate is the best BD/DVD/Video solution for Windows users to backup BD/DVD, compress disc and transcode video clip to almost all popular video and audio formats. Source: http://digisns.com/2015/06/m3u8-windows-converter-review/ Further Reading: GoPro 4K to ProRes 4K Workflow: Edit GoPro Hero4 4K Videos in FCP How to Transcode FLV Files to M3U8 Format on Mac? Get Sony Camera Video to Play on Apple TV Why Doesn’t VLC Decode NX 4K H.265 Video from Samsung? Edit Canon T6i/750D MP4 in Final Cut Pro Convert Panasonic P2 MXF to QuickTime MOV for Playing on Mac Yosemite Edit Sony A5100 XAVC S Files in FCP X Source: http://m3u8mediacentral.jimdo.com/2015/08/25/m3u8-windows-converter-review/
Summary: This guide will talk about the Sony A7R II XAVC S to Premiere Pro CC/CS6/CS5 incompatibility issues. If you are facing the issues importing Sony XAVC S to Premiere, just get the easy solution here.
 The Sony A7R II is the second generation of a series that set out to prove how serious a compact system camera can be. With a full-frame sensor, the range has offered image quality similar to some of the very best DSLRs, such as the Nikon D810 and Canon 5DS R.If you’ve got a Sony Full Frame Mirrorless Camera like A7R II, the 4K XAVC S format will not be an unfamiliar for you. The only problem usually occurred during the editing process. 4K XAVC S still cannot fully supported by some video editors like Premiere Pro can't ingest MP4 video from Sony A7R II directly.As we all know, MPEG-2 is the codec that Premiere natively recognizes. So the problem can easily turn to be how to convert Sony A7R II 4K XAVC S footage to MPEG-2 for edting in Premiere Pro CC/CS6/CS5. After the XAVC S to MPEG-2 conversion, you can directly import and edit the 100Mbps XAVC S files in Premiere without any importing problems and need not to search for the latest Sony XAVC S Plug-ins or wait for the release of the suitable one.Here Pavtube Video Converter, a solid tool to help users convert 4K XAVC S to MPEG-2, which ensures the best results when using in Premiere Pro CC/CS6/CS5. With this professional XAVC S to Premiere converter, you can effortlessly encode/re-encode 4K or 1080p XAVC S from Sony A7R II for smoothly importing and editing in various non-linear editing systems (NLEs), including Final Cut Pro X, FCP 6/7, iMovie, Final Cut Express, Adobe Premiere Pro, Avid Media Composer, etc. Other Download:- Pavtube old official address: http://www.pavtube.com/video_converter/- Amazon Download: http://download.cnet.com/Pavtube-Video-Converter/3000-2194_4-75734821.html- Cnet Download: http://download.cnet.com/Pavtube-Video-Converter/3000-2194_4-75734821.htmlHow to import Sony A7R II 4K XAVC S files to Premiere Pro CC/CS6/CS5?Step 1: Download and have a quick installation. The trial version will have a watermark on your converted files. Except for that, there are no time limitation, no virus, and no unnecessary bundle apps while downloading. After that, click “Add Video” button to load your Sony XAVC S videos. You can load several files at once thanks to “Add from folder” button.Step 2: Click the drop-down list in the format line to get the format box. Then choose “Adobe Premiere/Sony Vegas>>MPEG-2 (*.mpg)” as output format.Step 3: Click the “Settings” button and set proper video/ audio parameters. My advice is to set the video size, bit rate and fame rate to be exactly as the footages so that you will suffer least quality degradation. If you would like to use default settings, simply skip this step.Step 4: After all necessary settings, hit the “Convert” button to start the XAVC S to Premiere best supported MPEG-2 conversion.
Conclusion: After conversion, you can get the generated files by clicking “Open” button. Now, you’ll get no troubles in editing Sony A7R II XAVC S in Premiere Pro CC/CS6/CS5. Follow the steps and have a try!Source: http://pc-mac-compatibility-issues.blogspot.com/2015/09/import-sony-xavc-s-to-premiere.htmlFurther Reading:
Summary: Do you have a desire to import Sony HDR-AS200V XAVC S to FCP 7/X? In this article, you’ll learn how to achieve this goal.
 Meet the NEW Action Cam HDR AS200V, the highest image quality of all Full HD Action Cam ever. You may have got the Sony HDR-AS200V camera which recorded some full-HD footages in XAVC S format. Do you have a desire to import XAVC S to FCP 7/X for editing?XAVC S, a new format introduced by Sony with MPEG-4 AVC/H.264 level 5.2, the highest picture resolution and frame rate video compression codec is much more than a video format that FCP can support. So, it’s not strange that you have met so many Sony XAVC S to FCP import issues.First of all, let’s look at a case found online. “I have a bunch of XAVC S files from a Sony HDR-AS200V. What is the easiest way to import XAVC S to FCP? When I try to import, FCP won’t allow me to use the XAVC S files as it doesn’t have the codec for it.”As you can see, XAVC S is not among the accepted video types by FCP. To load Sony HDR-AS200V XAVC S files into FCP, you should convert Sony XAVC S to FCP best accepted ProRes MOV. Pavtube Video Converter for Mac is perfect for you to finish the conversion job on any Mac version, such as El Capitan, Yosemite. It will save you both time and trouble, and all you need to do is to drag the result videos for prompt editing. Other Download:- Pavtube old official address: http://www.pavtube.com/video-converter-mac/- Amazon Store Download: http://www.amazon.com/Pavtube-Video-Converter-Mac-Download/dp/B00QIBK0TQ- Cnet Download: http://download.cnet.com/Pavtube-Video-Converter/3000-2194_4-76179460.htmlHow to import Sony HDR-AS200V XAVC S to FCP 7/X?Step 1: Download and have a quick installation. The trial version will have a watermark on your converted files. Except for that, there are no time limitation, no virus, and no unnecessary bundle apps while downloading. After that, click “Add Video” button to load your Sony XAVC S videos. You can load several files at once thanks to “Add from folder” button.
 Step 2: Click the “Format” bar to get the drop-down menu and you can get “Final Cut Pro>>Apple ProRes codec”, including ProRes 422, ProRes 422 (HQ), ProRes 422 (LT), ProRes 422 (Proxy) and ProRes 4444. Choose the proper one you want. Here, we suggest you to choose “Apple ProRes 422 (*.mov)” as the best output format.Step 3: Click the “Settings” button and set proper video/ audio parameters. My advice is to set the video size, bit rate and fame rate to be exactly as the footages so that you will suffer least quality degradation. If you would like to use default settings, simply skip this step.Step 4: After all necessary settings, hit the “Convert” button to start the XAVC S to FCP best supported ProRes MOV conversion.Conclusion: If you have added quite a bunch of XAVC S files, it would take some time to convert. In such case, youcan click “Option” and tick the box “Shut down the computer after conversion”.Source: http://1080p-video-tool.blogspot.com/2015/09/import-sony-xavc-s-to-fcp.htmlFurther Reading:
Summary: Have a desire to import Sony HDR-AZ1 1080/60p XAVC S to FCP for editing? This article will give you some hints to convert Sony XAVC S to ProRes.
 This Cam can records video in XAVC S Codec, which is intended as a more economic and simpler consumer codec, and more appropriate to simpler editing and Internet streaming applications. The previous version of FCP, is not compatible with XAVC or XAVC S. Only the latest version - Final Cut Pro 10.1 (Final Cut Pro X) adds general QuickTime support for XAVC. For fast and fluid workflow, Sony has created a special plug-in (PDZK-LT2 V.1.2), a free-of-charge software for Mac which allows you to decode XAVC S to QuickTime. The plug-in supports SxS Card. However, you can not use HDR-AZ1 import Plug-in to preview.Actually, it's not so hard to do the trick. Final Cut Pro works natively with Apple Prores Codec, a line of intermediate codecs, intended for using during video editing to help provide an efficient and high performance workflow with impressive image quality and reduced storage rates. With a professional XAVC S converter- Pavtube HD Video Converter for Mac, you can get the work done easily. This software is able to convert XAVC S files from Sony Action Cam Mini HDR-AZ1 to FCP fully compatible format and keep original quality at the mean while. It can also export MPEG-2 for Premiere Pro, Apple InterMedaite Codec (AIC) for iMovie/FCE, DNxHD for Avid Media Composer for native editing. Other Download:- Pavtube old official address: http://www.pavtube.com/hd-video-converter-mac/- Amazon Store Download: http://www.amazon.com/Pavtube-Video-Converter-Mac-Download/dp/B00QI9GNZS- AppStore Download: https://itunes.apple.com/de/app/pavtube-hd-video-converter/id502792488?mt=12- Cnet Download: http://download.cnet.com/Pavtube-HD-Video-Converter/3000-2194_4-76177786.htmlHow to convert Sony HDR-AZ1 XAVC S to FCP?Step 1: Backup your XAVC S files from Sony HDR-AZ1 to hard drive. Install and launch this program. Drag and drop XAVC S files to the software. You can import multiple files at once thanks to “Add from folder” button.Step 2: Click the drop-down list in the format line to get the format box. Then choose “Final Cut Pro>>Apple ProRes 422 (*.mov)” as output format.Step 3: Click “Settings” button to customize the output video and audio settings by yourself. But if you are not good at it, you’d better use the default parameters, they will ensure you a good balance between file size and image quality basically. You can change the resolution, bit rate, frame rate as you need.Step 4: You can preview to check the final result. Once you are satisfied with it, click the “Convert” button to start converting XAVC S to ProRes format. It will take you a little while.Conclusion: After conversion, you can get the generated files by clicking “Open” button. Now, you’ll get no troubles in editing Sony HDR-AZ1 XAVC S files in FCP.Source: http://lovecamcorder.tumblr.com/post/128171880912/edit-hdr-az1-xavc-s-in-fcpFurther Reading: